Choose the right parrot cage with confidence: species-by-species sizing, bar spacing, safe materials, placement, perches, toys, and cleaning routines from the Beak School team.
You cannot put a small bird in a giant cage if the bars are spaced for a macaw.
A bird who can push their head between the bars can get stuck. A bird who gets stuck panics. That is how birds get hurt, and occasionally how they die. It happens fast and it happens quietly.
So the order of operations is: find cages with bar spacing safe for your bird, then buy the biggest one of those you can afford.
Smaller spacing is always safer than larger. If you are choosing between two options and one has narrower bars, take the narrower bars. A budgie cannot get their head through a half inch gap. They can absolutely get it through an inch.
If you are not certain what is right for your species, ask your avian vet or a knowledgeable supplier before you buy. It takes one phone call and it removes the guesswork.
Three Things to Check Before You Buy
Forget the size chart on the box. Here are three tests you can run on any cage, for any species, that tell you what you actually need to know.
Can your bird spread both wings and turn in a full circle? This is the width test. Parrots need to open up. A bird who cannot stretch out is a bird whose body is being slowly restricted, and you will see it in the feathers before you see it anywhere else.
Is there room for perches at three different heights? This is the height test. Your bird needs a high spot, a middle spot, and a low spot. Not because it looks nice, but because a bird with one place to be has no choices at all. We will come back to why that matters so much.
Is the tail clear? Watch your bird sit on their highest perch. Is the tail touching the bottom of the cage? Rubbing the side? Pressed against a wall or a toy? If yes, the cage is not tall enough or the perch is placed wrong. Long-tailed birds like parakeets, Alexandrines, and macaws need serious clearance, and it surprises people how much.
Pass all three and you have a workable cage. Fail any one of them and no amount of training will make up for it.
Your Bird's Feathers Will Tell You If the Cage Is Working
This is the most useful thing in this entire guide, and almost nobody talks about it.
You do not need to guess whether your cage setup is right. Your bird will show you, every single day, for free.
Perfect feather condition means the setup is working. Smooth, clean, unbroken feathers tell you your bird has enough room and the layout suits them.
Broken feathers mean go looking. Not for a disease first, and not for a behavior problem first. Look at the space.
A bird with a broken, ragged tail is hitting that tail on something. Your job is to find out what. Is the tail going through the bars on the side? Is it dragging on the bottom grate? Is it slapping a wall every time they turn around on their favorite perch? Is a toy hanging exactly where the tail swings?
Broken wing feathers work the same way. Something is in the way, and the bird is contacting it over and over.
Once you find the contact point, you fix the space. Move the perch. Move the toy. Get a taller cage. The feathers grow back and they come back clean.
Make this a habit. Every week, look at your bird's feathers the way you would check the oil in your car. It is the earliest warning system you have.
If feather damage looks like chewing or pulling rather than wear and breakage, that is a different situation and it needs a certified avian vet, not a cage adjustment.
Perches: The Part Most People Get Wrong
Birds do not sit in chairs or sleep in beds. They stand on their feet, all day and all night, for their entire lives. The perch is the single most important thing you put in that cage, and it is the thing people think about least.
Diameter matters more than anything
Here is the test. Your bird's foot should curl naturally around the perch. Not squeezed shut. Not stretched flat.
Too narrow and the bird's weight lands on one small spot. The nails have nothing to rest against, so they overgrow, and overgrown nails cause their own set of problems.
Too wide and the foot cannot curl. It sits flat and open, and the pressure spreads unevenly across the pads. That is how sores start.
The good news is you do not need one perfect diameter. You need a range. A few perches of different thicknesses lets your bird shift their grip through the day, the same way you shift position in a chair. Some thicker ones in the mix are genuinely good, as long as they are not all thick.
Material
Natural wood wins, and not just for the feet.
Natural branches have texture, which is better for the feet than a smooth dowel. But the bigger reason is that your bird gets to chew them. Chewing is how a beak stays healthy, and destroying a perch is a completely normal, healthy thing for a parrot to do. Plan on replacing perches. That cost is part of owning a bird.
Some birds chew so much that natural perches do not last. That is not a problem to solve, it is a bird doing its job. A plain untreated pine board from the hardware store, swapped out every few days, works fine for a heavy chewer and keeps the cost sane.
Avoid perches covered entirely in sandpaper. They wear the bottom of the feet raw.
Check the feet
Get in the habit of looking at the bottom of your bird's feet. Here is what you are looking for.
Healthy feet have defined, distinct scales.
Early trouble looks like a small sore, often with a pink ring around it. Or scales that have worn smooth and pink instead of standing out clearly.
Caught early, these are easy to address. Left alone, foot problems can become chronic, painful, and very hard to treat. Early is everything.
You can check feet without ever grabbing your bird, and you should. Teach your bird to hang on the inside of the cage wire while you stand outside with the door closed. Give a treat through the bars for following your hand. Do it in small steps over days. Eventually your bird hangs there with their feet out front and you get a clear look at the pads whenever you want.
That same skill lets you apply a topical medication later without restraining your bird, which matters more than you would think. Restraint costs you trust. Every time you can avoid it, you keep something valuable.
Anything that looks like a sore, swelling, or a change in how your bird stands should go to a certified avian vet.
Layers and Levels: Why One Perch Is a Problem
Imagine you were moved into a house with one room and one chair. Not a bad chair. Just the only chair.
How long before you hated that chair? How long before the fact that there was nowhere else to go started eating at you?
That is a cage with one perch.
Parrots are among the most intelligent animals on the planet, and intelligent animals need choices. One perch means no choices, nothing to do, and nowhere to go. It is a stressful setup even in a large cage.
Here is how to build a cage that offers real choices:
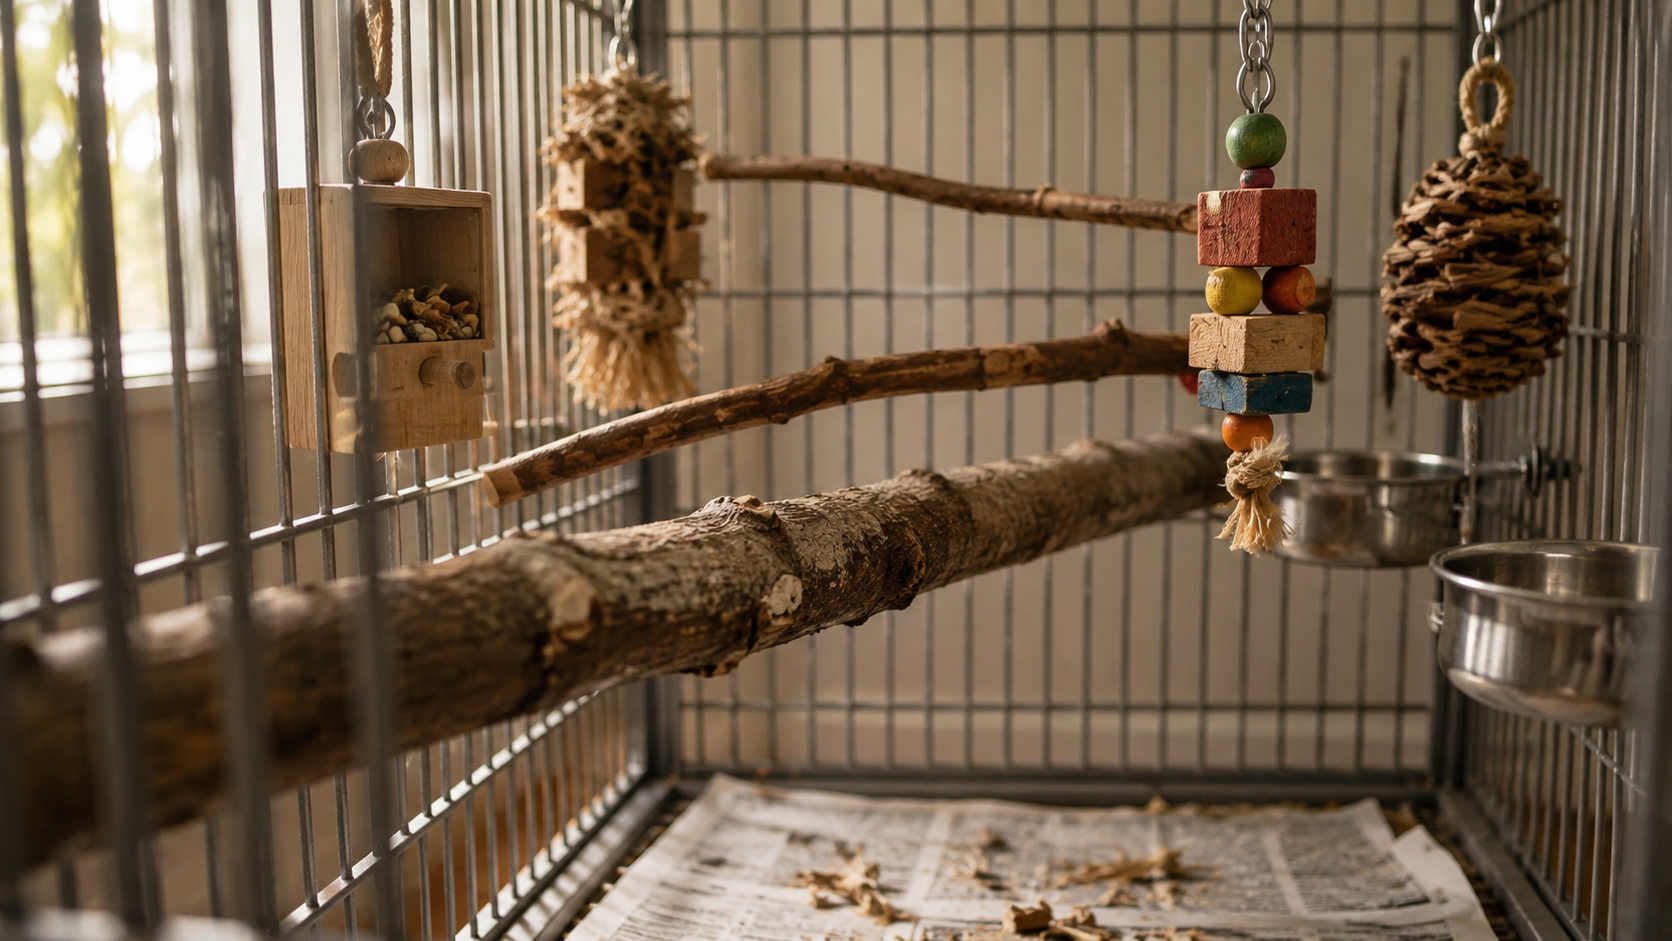
Use three or four perches minimum, at different heights. High, middle, low.
Come in from different directions. Run some perches out from the back wall toward the door. Run others across from the side walls. Different angles create different spaces, not just different heights.
Match the perch to the spot. Notice where your bird actually chooses to spend time. Put your best, most comfortable perch there.
Leave flying room if you can. In a large enough cage, a small bird can take a short flight between perches. That is exercise you did not have to schedule.
Keep the highest perch clear of the ceiling so the tail hangs free and the head is not brushing the top.
One more thing. Do not try to keep your bird low. A parrot's instinct is to go up, and up is where they feel safe. If you have a young or clipped bird you are worried about falling, put something soft on the cage floor as a cushion while they learn to climb, but do not encourage them to stay down there.
Toys: Enough, But Not Too Many
Toys do real work. They keep a smart animal occupied, and an occupied bird is not a screaming or plucking bird.
Rotate four to six toys at a time across three types:
Foraging toys that make your bird work to get food out. This is the closest thing to a wild parrot's actual job.
Destructible toys made of soft wood, paper, or palm leaf. Things meant to be shredded and thrown on the floor.
Puzzle and mechanical toys with bells, knots, and moving parts.
Swap them around weekly so they stay interesting.
Now the part people miss. Do not over-clutter the cage. It is possible to hang so many toys that your bird cannot move through their own space. You have taken away the room you paid for.
And your bird has to be able to reach a toy from a perch. A toy hanging in open space where there is nowhere to stand is a decoration, not enrichment. Hang the toy, then check that a perch actually puts your bird within reach of it.
What Not to Put in the Cage
Three things to leave out, and the reason is the same for all of them.
Happy huts, snuggle tents, and any enclosed hidey box. These read as a nest cavity to a parrot. Give a bird a nest cavity and you are telling them conditions are right to breed, which brings hormonal behavior, aggression, and egg laying you did not ask for.
Mirrors. They encourage a bird to form a bond with a reflection, which tends to feed the same hormonal patterns.
Cotton rope toys with loose threads. Loose fibers wrap around toes, and a wrapped toe can lose circulation.
While we are here, one habit worth building: clear out shredded material regularly. All that lovely destructible enrichment becomes nest lining once it piles up in a corner.
Where to Put the Cage
A good cage in the wrong spot still makes for a stressed bird.
Give at least one solid side. A wall behind the cage means nothing can approach from that direction. A corner with two solid sides is better still.
A view outside is wonderful, with a caveat. Birds love watching the world. But a hawk or an owl passing a window can badly startle a bird who has nowhere to hide. Give them a solid wall option too, and if you have blinds, leaving them partly closed breaks up the view enough that your bird feels less exposed while still getting the light and the interest.
Put the cage where the family is. Parrots are flock animals. A cage in a spare room nobody enters is isolation, and isolation shows up as behavior problems every time. The living room or a home office usually works well.
Stay out of the kitchen. This one is not negotiable, and it is the reason we are being blunt. Overheated non-stick cookware releases fumes that are lethal to birds. These gases are colorless and odorless, so owners often have no idea their bird was exposed, and in many cases sudden death occurs before treatment can even begin (VCA Animal Hospitals). Other sources include irons, ironing board covers, some self-cleaning ovens, and some heat lamps (Merck Veterinary Manual). Keep birds well away from the kitchen and never use non-stick cookware in a house with a bird if you can avoid it.
Avoid direct sun, drafts, and air vents. A bird stuck in a hot sunbeam with no shade can overheat. A bird sitting in the path of an HVAC vent is dealing with moving air all day.
Put a nightlight in the room. This is one of our favorite small recommendations. Birds get startled at night, and a startled bird in total darkness cannot see to orient themselves. That is how night falls and injuries happen. A nightlight lets them open their eyes, see where they are, and settle back down.
About Covering the Cage at Night
This is a tradition worth reconsidering.
Think about when a wild parrot would ever experience complete darkness. Not at night. There is starlight, moonlight, city glow. The one place a parrot experiences total darkness is inside a nest cavity.
So when we throw a cover over the cage, we may be sending the same signal as a happy hut: this is a nest, conditions are good, time to breed.
Some birds have grown up with a cover and genuinely expect it, and they will act out if it does not come. If that is your bird, keep covering. But if you are setting up a new bird, it is worth simply not starting the habit.
Cage Materials and Safety
Stainless steel is the gold standard. Non toxic, does not chip, lasts decades. It costs more up front and less over a lifetime.
Powder coated steel is the common option and is fine while the coating is intact. Inspect it regularly. Chewed or flaking coating can expose the metal underneath.
Be careful with galvanized wire and secondhand cages. Coated birdcages and galvanized wire and hardware are listed among common sources of zinc for pet birds (Merck Veterinary Manual). Check any cage for flaking paint or white rust before you use it (Pet Poison Helpline). If you inherit an older cage, inspect it thoroughly before your bird ever goes in it.
Cleaning Routine
A clean cage protects your bird's airways and gives you a daily health check at the same time.
Daily. Change the liner. Plain newspaper or butcher paper is perfect, and skip anything scented. Wash food and water bowls with hot soapy water. Look at the droppings. Color, amount, and consistency are the earliest signal you get that something has changed.
Weekly. Wipe down perches, bars, and the grate. Rotate the toys. Check the feathers.
Monthly. Take everything out and scrub it. Inspect for rust, chipped coating, loose welds, and worn perches.
Never use bleach, ammonia, scented candles, plug-in air fresheners, or essential oil diffusers around a parrot. Bird lungs are far more sensitive than ours, and plenty of products marketed as natural are still dangerous.
Here is a tip that makes deep cleaning painless: teach your bird to go into a travel carrier on their own. No hands, no chasing, no grabbing. Set the carrier flush against the cage door and reward your bird for stepping in. Once your bird will do that willingly, you have solved deep cleaning, vet trips, moving your bird to another room, and emergencies, all with one skill.
Shake Things Up Now and Then
Here is a trick that will not be in most cage guides.
In the wild, breeding is triggered by conditions. Steady, favorable, predictable conditions say "now is a good time." Disruption says "not this year."
A cage that never changes reads as stable and favorable, which can feed hormonal behavior.
So change it. Move the cage to a different wall. Rearrange the perches. Move the coconut toy to the opposite corner. Your bird spends the next few days figuring out the new layout instead of thinking about nesting, and you get mental stimulation for free.
The Cage Is Not the Whole World
Even a perfect cage is a bedroom, not a life.
Your bird needs meaningful time outside the cage every day, with a play stand, training sessions, and real interaction with their people. How much depends on your bird and your setup, but "some, every day" is not optional.
If your schedule genuinely cannot support that, we would rather you knew that before you brought a bird home than after. We say that with care, not judgment.
One Last Thing About the Cage and Biting
A lot of biting starts at the cage door.
The cage is your bird's space. When a hand comes into it uninvited, and the bird has nowhere to go, biting is one of the few options they have left. Reaching into the cage is one of the most common situations where owners get bitten, and it is almost entirely avoidable.
The fix is not to push through it. The fix is to teach your bird to come out on their own, using a target stick and rewards, with you outside the cage and the door open. Your bird chooses to come to you. Nobody gets cornered, and nobody gets bitten.
That is a much longer conversation, and it is one of the things we teach in detail inside our courses at Beak School.
Final Thoughts
A good cage, thoughtfully placed and properly set up, does an enormous amount of work on your behalf. It prevents problems instead of creating them. It supports your bird's body. And every single day it tells your bird the same thing: you are safe here.
Spend more on the cage than feels comfortable. You will get it back in vet bills you never paid, furniture you never replaced, and a bird who trusts you.
And when you are standing in the store deciding between two cages, remember the rule. The bigger one, as long as the bars are safe.
A Note on Your Bird's Health
Nothing in this guide is veterinary advice, and it is not a substitute for one. Everything here is about setting up a space that supports your bird. It cannot diagnose anything.
If you see feather damage that looks chewed or pulled, sores or swelling on the feet, changes in droppings, changes in breathing, or a bird sitting fluffed on the cage floor, that is a veterinary matter and it needs a certified avian vet, not a cage adjustment. Find one before you need one. Waiting until an emergency to start looking is the worst possible time.
If you suspect your bird has inhaled fumes from overheated cookware or any other source, get them into fresh air and call a vet or an animal poison control line immediately.
Sources
Chalmers, S., Mullan, S., Robinson, N. & Green, M. (2024). What are the priority welfare issues facing parrots in captivity? A modified Delphi approach to establish expert consensus. Animal Welfare, 33, e56. Read it
Merck Veterinary Manual. Toxicoses of Pet Birds. PTFE gas poisoning sources and presentation. Read it
Merck Veterinary Manual. Zinc Toxicosis in Animals. Household and cage-related sources of zinc. Read it
VCA Animal Hospitals. Teflon (Polytetrafluoroethylene) Poisoning in Birds. Read it
Pet Poison Helpline. Zinc Is Toxic To Pet Birds. Cage inspection guidance. Read it
Cage sizing, perching, foot health, layout, and hormonal management guidance in this article comes from the Beak School course library and webinar archive.